Week 11 Report on UC Verde drought tolerant lawn in Los Angeles:
My lawn's progress report is way behind!
I felt like I was going to be receiving my "lawn report card" when a representative from Fora Source, the distributer for UC Verde dropped by to see my lawn's progress.
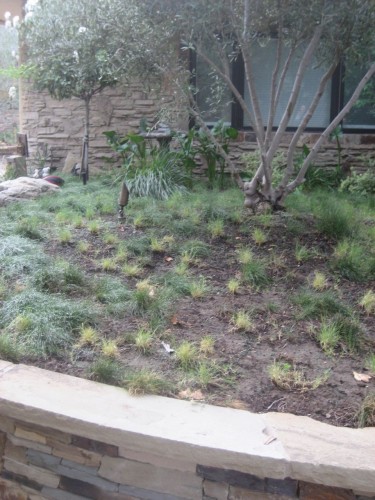
Unfortunately, My UC Verde drought tolerant buffalo grass seems to be growing in slow motion.
I've been following the progress of other bloggers who are testing this lawn and one of them who started their lawn after I did, is already ahead of me in terms of the lawn knitting itself together!
What's up with that?
Susan Morrison of Blue Planet Blog's UC Verde Lawn at 4 weeks!
(Okay, she spaced the plugs closer at planting time, but her grass seems to be growing at a faster pace!)
Isn't my 100 degree-like weather just effective as hers for this heat loving grass?
Lazy Gardening bloggers UC Verde lawn at week 16.
This is what I want to see in my yard, a span of green in the midst of a heat wave!
According to Flora Source, my lawn progress has been delayed for a couple of reasons.
1. The soil is drying out too fast making it difficult for the running stolons to adhere to the soil. Flora Source suggested I add a moisture-retaining mulch to keep the soil from drying out between watering.
2. UC Verde grass needs a boost of nitrogen in the establishing phase, I was due for a fix.
So, I did everything I was instructed to do:
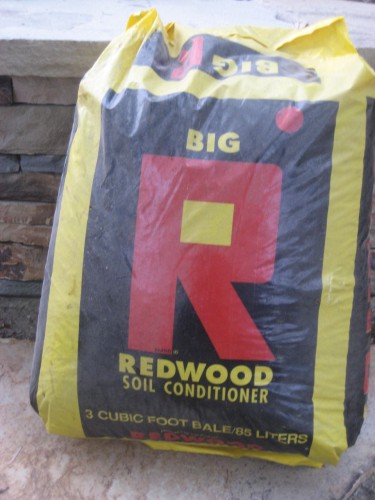
Redwood soil conditioner is excellent for my clayish soil, improving the texture and drainage as it slowly breaks down.
It also traps the moisture in the soil where I need it.
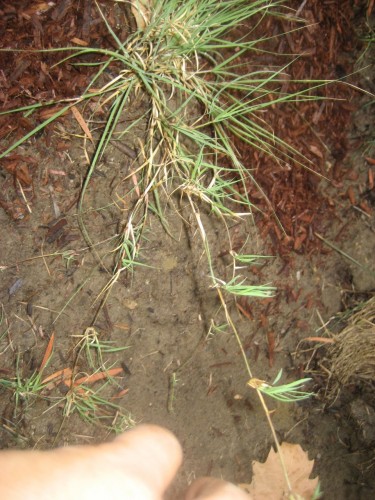
The grass is spreading, as this long stolon indicates but it is growing upwards rather than low to the ground
My lawn has been fed with slow-release organic nitrogen, (7-3-2 nutrient ratio), mulched and lovingly watered.
Now, grow darn it!
For more information on organic lawn care, visit Paul Tukey's website SafeLawns.org
Read previous posts:
UC Verde Test Lawn: Part 1
UC Verde Test Lawn: Part 2
LATEST UPDATE: OCTOBER 9, 2015- (6 YEARS AFTER PLANTING!)
Subscribe to Eden Makers for updates to the UC Verde lawn test series and other information about making your garden sustainable, edible and gorgeous!


HI Barbara,
Your comment prompted me to update the blog series.
Shame on me!
Thank you.
Take a look at the blog post: UC Verde Drought Tolerant Lawn Review: Year 6
Hi Shirley,
Just wondering what the final outcome of your UC Verde testing was. I would love to know whether the others still have this as their low water-use lawn.
Thanks,
Barbara
Shirley – How’s the lawn doing? I am sad to report that I’ve had to mow mine FOUR times so far this year.
Looking at your reports, we did a couple of things differently:
1 – It was a new install, and I had some huge compost piles, so I had the guys thoroughly till about 4 inches of compost into the area before they installed the sprinklers.
2 – I used the Zeba root dip recommended by Todd Valley Farms. It holds moisture near the roots. I think this may have made a big difference in speed of establishing.
3 – After the initial thorough soaking, I was watering more frequently than you, for shorter periods of time, during the establishment period. I started with three times a day, three minutes a time, then twice a day.
4 – I may have continued the frequent watering longer than you did. I didn’t drop below twice a day until the runners were pretty thick, then went to every day, every other day, every third day … increasing watering time as I increased the interval between watering.
I planned from the first that it would be pampered through the first summer as if it were Bermuda.
The payback is this summer, with it getting watered less than once a week (at 100-105°+), versus Bermuda’s 2 or 3 times a week. And I mow a lot less.
Hi Meg,
I owe you guys an update now that I’ve experienced my first winter with UC Verde. It’s claims regarding drought tolerance are right on, I just did not like losing the green color of the grass in the winter time. I also had a difficult time having the grass knit together fast. Other people have not had this problem.
Another drought alternative that I have been very impressed with is the Eco-Lawn. Same claims as UC Verde but stays green year round.
See it at EcoLawn.com
Shirley
Any updates on UC Verde? I’m thinking of putting it in, but it seem like it didn’t work fantastic for you yet …
looking forward to hearing more about your lawn as spring kicks in…!
i found your site thru lawnrevolt.org … would love to see how this miracle grass (UC Verde) does in Austin. I’m guessing our climates are fairly similar. We get titanic droughts in July/Aug.
Hi
The UC Verde lawn did not knit completely before the winter. I would say it is at 85%. Not sure why it didn’t completely fill in within the 4-5 months prior to winter. It was a very hot summer which should have helped it along. Perhaps because this area in my yard gets some filtered shade. It is now dormant and is sporting a buff color. Am anxious to see how soon it greens up and knits together!
Shirley
hi, I’m in SD and I’m currently looking into using UC Verde for my new lawn.
any updates on your UC Verde? did the plugs finally knit together prior to the winter setting in?
thanks
Hi Roger,
Thanks for discovering Eden Makers and for your comment!
It’s true that the initial investment in watering the UC Verde and fertilizing it to get going is more or less, typical of most lawns. The payoff is after establishing it.
Less water is required and mowing needs are less because of slower growth. I can see using it in larger areas. I’m a fan of the Eco-Lawn as well.
Shirley
It looks like you have to have the ideal moisture control soil and nutrients to get it started. Much work and expense on the front end. I could see it being used in small patches as ornament to gardens or as nice path between gardens. Keep up the good work. I’m new to your site but will bookmark your site.
Regards and best wishes,
Friendly Texican
I feel your pain Shirley!! I have been eager and hopeful about your experiment. I soooo don’t want to file this lawn alternative into the “too good to be true” category. Crossing all fingers and toes, etc. Thank you for doing this.
Whatever……you guys are spoiled!
Susan … I like saying neener, neener, neener to people who have TV shows!
What a bummer! I’m really surprised, thought you’d go great guns once the weather heated up. I am a very haphazard gardener and didn’t do anything to amend the soil other than mix in a little compost. Like Lazy Gardener, though, I did pile on the water in the first few weeks, watering once or twice a day. Now I’m trusting my ET controller, but am supplementing with an extra 3 minutes 2 or 3 times a week.
Do you think there’s just not enough sun? Seems like you mentioned the spot is in part shade.
I’m posting new pictures in a few days. If you want to avoid gnashing your teeth, you may want to avoid my blog for a while, LOL!
Shirley – Mine was very upright and tufty for a while.
I tilled in 2 inches of home-made compost before planting and gave the dirt a light sprinkling of ammonium phosphate or ammonium sulphate (I forget which I used) at planting. I’ve fertilized it once since then, very lightly.
I set the sprinkler timers to water the area 3 times a day at the first for a few minutes each time to ensure it was moist enough for the runners to root.
Have you tried mowing, or just clipping the clumps off?