

Summer is the season when many once beautiful potted plants start to look like they are about to die.
It doesn't have to be this way if you invest a few minutes each week to care for your plants.
Watering, pruning, and fertilizing are key gardening activities during the hot summer months.
If you are diligent, your container plants will look as glorious as the ones hanging on Main Street at Disneyland!
(I'm exaggerating, of course)
Realistically, with proper care, you can expect your container plants to pump out flowers, grow in size, and perform as promised on the plant tags, all summer long!
If you are new to container gardening, these are some essential gardening skills that will help you care for your plants during the summer.
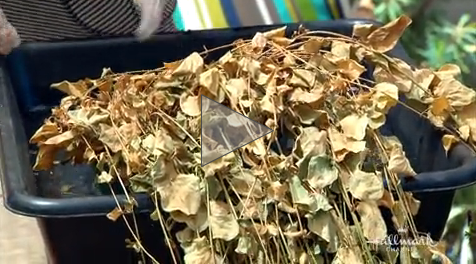
"Potted Plant Care For Summer By Shirley Bovshow" video as presented on the Home & Family Show on the Hallmark Channel.
HOW TO REHYDRATE A PARCHED PLANT

Take a close look at your parched plant.
Does it still have some green leaves and pliable, green stems?
Congratulations!
Your plant is still alive, but it needs your immediate intervention!
On one hand, you have a very ugly looking plant that you may feel tempted to toss out.
Not so fast, though; you can revive it!

When the soil in your container garden becomes parched or overly dry, you can't rehydrate it just by watering it in normal fashion.
Parched soil can become a dry, solid mass that repels water, refusing to allow water to penetrate through to roots of plants.
A tell-tale sign of parched soil is when the potting soil pulls away from the inside walls of the container.
Watering soil in this condition is futile since the water simply pours down the sides of the container and out of the drain hole.
Here's what to do:
1. Fill a bucket or trough that is larger than your container with lukewarm water.
2. Place your container inside the trough so that water can enter through drain hole and rehydrate the plant from the bottom.
You may have to leave your container in the water for a few hours or overnight until all the soil feels wet.
Once the soil is rehydrated, remove the plant from the basin and allow soil to dry to the touch at 1-inch deep.
Begin watering your plant in a more regular fashion so that it doesn't become parched again.
Add more potting soil, compost and fertilizer to your container as most of the nutrients may have leached out of the pot.
Make sure to keep a 1-inch gap between the top of the soil and top of the rim of planter.
Now that you've revived your plant, don't let it happen again!
HOW TO DEADHEAD OR PRUNE AN ANNUAL PLANT
Summer heat is responsible for rampant growth and flowering of healthy plants, which is a good thing.
The flip side is that these flowers don't live forever and look unsightly after blooming.
Once an annual flower blooms, it begins to decline, eventually withers, sets seed, and dies!
This is why annuals don't last very long, but you CAN extend your plant's life by "deadheading."

Deadheading is simply pruning or cutting off the dead flowers and stems back to a node, or where leaves of the plant emerge.
If you remove the dead flower without removing the stem, chances are the seed is still on the plant.
Remove it all so that your plant can regenerate and give you another round of blooms!
I've been able to coax several flushes of flowers on my annuals through deadheading.
Give it a try!
HARDPRUNING ANNUALS

Sometimes a plant looks VERY spent and is a mix of dead and living stems.
Going through a plant looking for the live stems may take too much time and 20/20 vision.
I don't have either.
In situations like this, I do a "hardpruning" of my annual plant, cutting back all stems to just a few inches long.

You can do the same provided you are not at the end of your summer and you have a mild fall and long growing season.
FERTILIZE YOUR POTTED PLANTS!

Put your potted plants on a feeding schedule during the summer growing season and you'll be impressed with their performance!
Potted plants are at your mercy for nutrients as they can only access what you provide them.
Regular watering is vital, but it also causes nutrients to leach from the soil.
Fertilize your plants!
Fertilizers come in a variety of blends with different ratios of vital nutrients for plants.
There are organic blends and non-organic.
I prefer organic and like the Gardner & Bloome line.
Look for the three numbers on the fertilizer package in the photo above.
It reads, "3-7-4."
The numbers indicate the percentage of essential nutrients that the fertilizer provides.
Beginning with the first number, the numbers represent the percentage of nitrogen, phosphorus and potassium in the formula, in that order.
You can see that there is more phosphorus (#7) in this formula, followed by potassium (#4) and nitrogen (#3).
Phosphorus and potassium are essential in bud and bloom production in a plant and so the fertilizer blend is aptly named "Bud & Bloom" fertilizer.
You don't need to be a master gardener to select fertilizer for your specific need; there are many pre-mixed formulas.
The package comes with instructions for applying the right amount of fertilizer by container size, so you can't go wrong.
What you should be aware of is that fertilizers, even organic ones, have the potential to "burn" your plant if you get any on your leaves or flowers.
Apply fertilizer to the soil, scratch it in, and then water immediately.
Depending on the formula, the fertilizer can last anywhere from 10 days to 2 months.
You'll be thrilled at how beautiful you can maintain your potted plants during the summer if you practice careful watering, deadheading and fertilizing!

Garden expert and designer Shirley Bovshow on Home & Family Show, Hallmark Channel
LEARN MORE ABOUT HOW TO READ A FERTILIZER LABEL!
Interested in understanding plant fertilization better?
Watch my video below.
Enjoy my fun video about fertilizing your plants.
You will learn so much!
Your Commment
You must be logged in to post a comment.