If you would like a unique display for your Thanksgiving table, consider making my miniature birch arbor centerpiece, filled with foraged flowers, fruits and vegetables.
The centerpiece is easy to make and is affordable but it looks like you spent hundreds of dollars on it.

I came across a sidewalk full of fallen birch tree branches that someone was throwing away.
Apparently, these homeowners have never shopped at Michael's or they would have known that these birch branches were valuable!
People actually pay for this type of "yard refuse!"
The moment I saw the beautiful white branches, I had an immediate vision for them as a whimsical miniature arbor, complete with twinkling light roof.

The project was presented on the Home & Family show in a segment with host, Cristina Ferrare where we put together a holiday tablescape.
Watch the video of the segment and enjoy the instructions and project and behind the scenes photos below.
MATERIALS FOR MINIATURE BIRCH ARBOR CENTERPIECE
- 8 birch tree branches (1/4"-inch diameter and smaller)
-
Assorted Birch tree twigs
-
LED battery operated twinkle lights
-
4 bricks of Oasis Floral Foam
-
4 square wood planters with plastic liner
-
waterproof foam glue
-
Quick Dip flower hydrating solution
-
Quake Hold- museum putty
-
wired twine in natural color
-
Assorted flowers, wild berries, seed pods from neighborhood plants
-
Assorted jewel-tone colored fruits and vegetables
-
floral wire
Hosting a holiday dinner & looking for a unique centerpiece? Shirley Bovshow's " Garden World Report Show" has the perfect project! For more great DIYs, tune in to Home & Family weekdays at 10/9c on Hallmark Channel!
Posted by Home & Family on Saturday, November 14, 2015
INSTRUCTIONS
1.CUT BIRCH BRANCHES
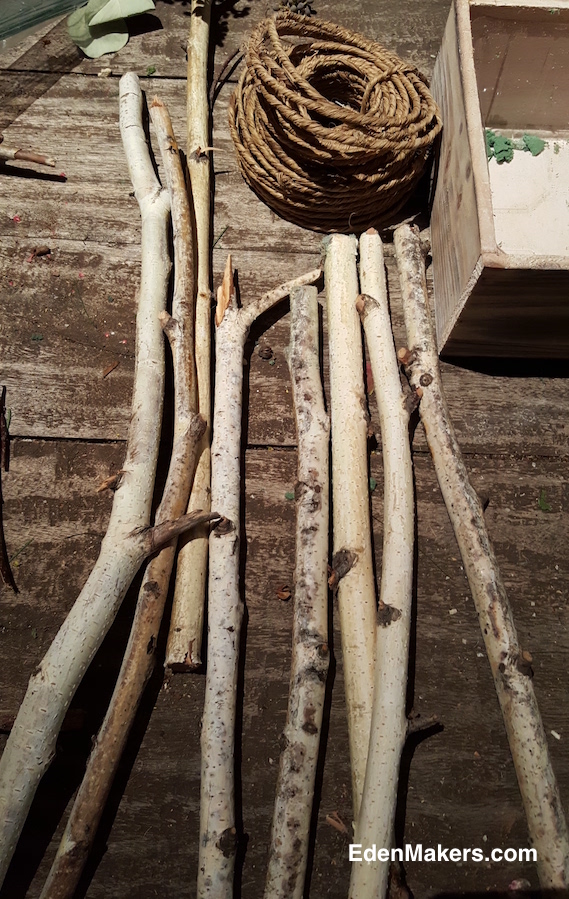
Cut four birch tree stems the same size.
These will be your "arbor columns."
Since this Thanksgiving centerpiece is a custom made project, make the arbor in scale with your table.
The rule of thumb is that your centerpiece should not be too tall that it blocks you from seeing the person across the table.
The arbor is very open and airy, so height is less of an issue.
2. PREPARE FLORAL FOAM IN WATER
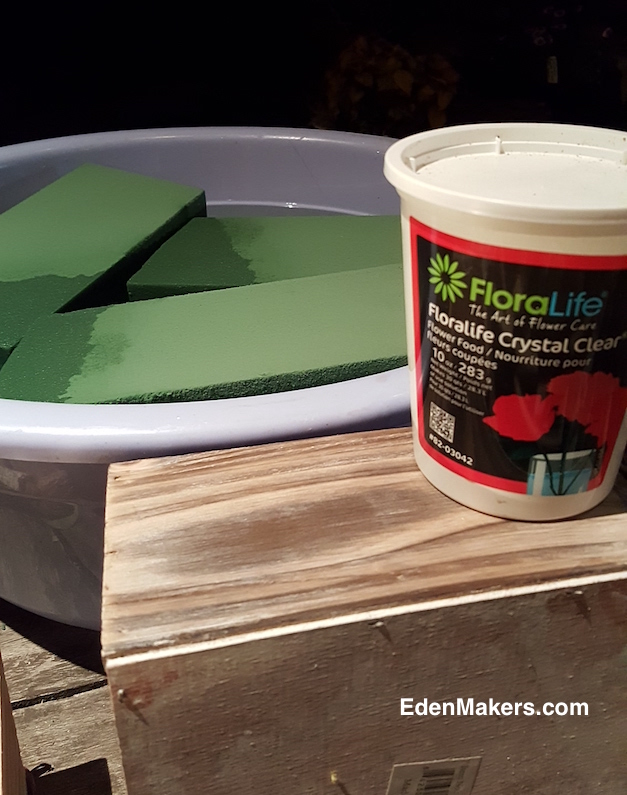
Float four bricks of Oasis floral foam in water that has been conditioned with flower food.
Don't force the bricks down in the water.
Allow them to sink naturally as they soak up the water.
This will take a few minutes.
3. INSERT BIRCH BRANCHES IN FOAM

Start building your arbor structure by inserting four birch branches in floral foam, creating your vertical columns and horizontal beams.
Reinforce the foam hole where branch is inserted with foam glue.
I found a small, 12" x 12" wood platform on sale at Joann's for four dollars that looks like a deck, so I added it to the design.
The Oasis floral foam is placed in low wood planters, lined with plastic.
It is ready for the flowers and other materials.
4. SECURE GAZEBO STRUCTURE

Use "Quake Hold," or, museum putty to secure the branches to each other.
Bind the stems afterwards with a wired twine in a natural color.
5.ADD BIRCH TWIGS AS PATIO COVER AND LED LIGHTS
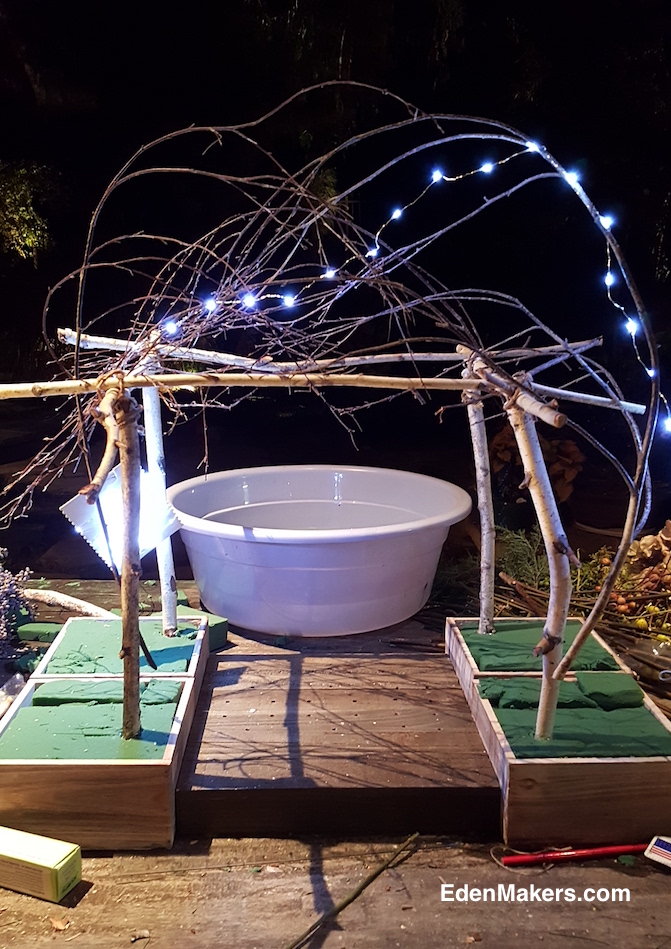
Now that the arbor is built and LED battery operated lights installed on the roof, it's time to do some floral design!
I recommend that you use a "floral hydrating solution" such as "Quick Dip" to condition flower cuttings that you have foraged.
The solution helps to "clear" and clean out your flowers water-way so that it can draw up water efficiently.
Commercially prepared flowers are usually conditioned for you before you buy them.
With Quick Dip, I was able to condition even flowering woody plants like bougainvillea for my centerpiece!

Some of the foraged plants in this centerpiece include flowers or fruit from the Koelreuteria bipinnata tree, silver dollar Eucalyptus leaves, thistle, amaranthus and bougainvillea.
I purchased a dozen red dahlias and garden roses to fill in.
One of my favorite design approaches is to add fruit and vegetables to a flower arrangement.
I cut a white radish in half to reveal it's ruby pink flesh.
Gorgeous!
I also added kohlrabi, striped pink beans, plums, green pears and radicchio.
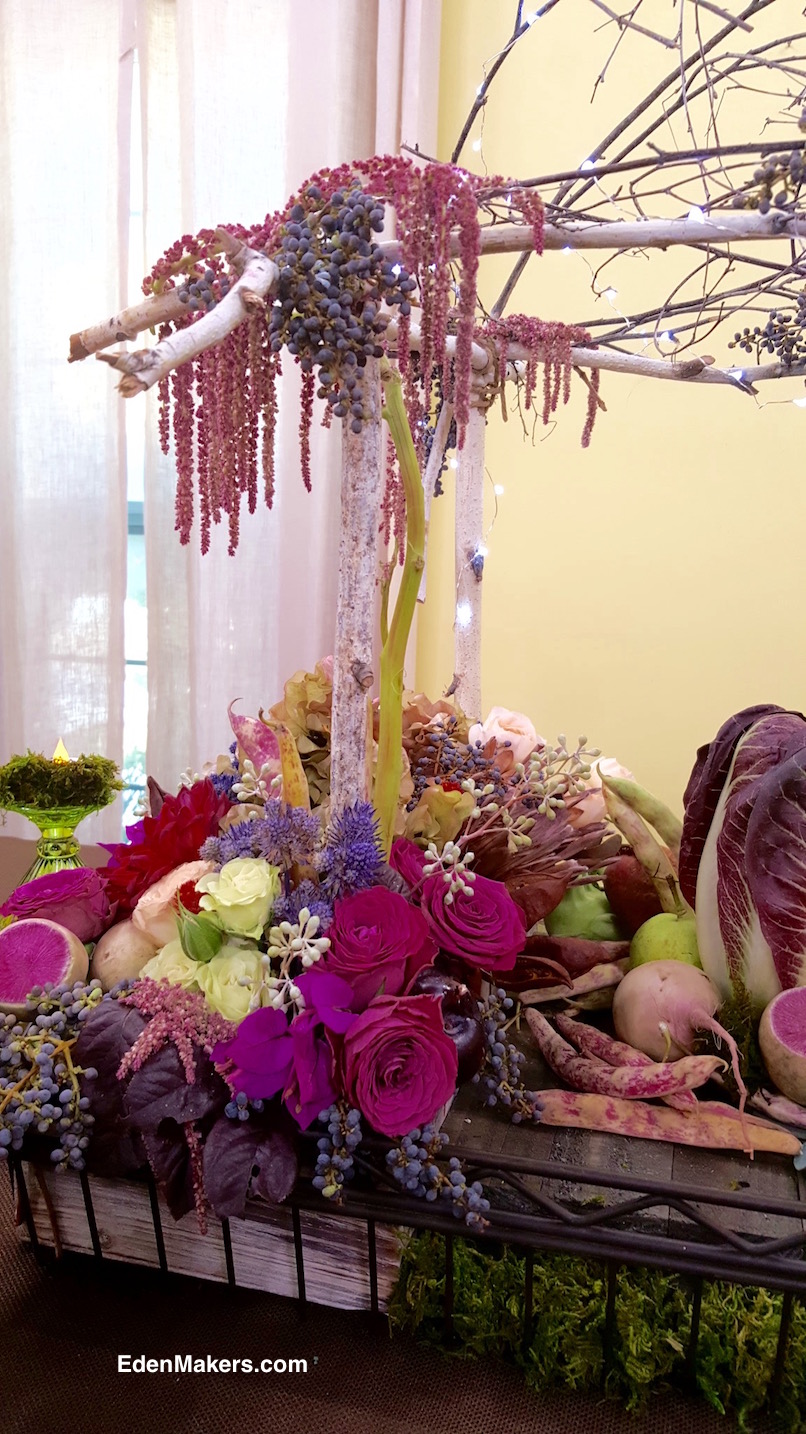
Jewel tones abound in this Thanksgiving centerpiece by Shirley Bovshow

Thanksgiving tablescape with brown tablecloth, two-color- napkins in eggplant and linen with gold trim and sage green ribbon by Cristina Ferrare.
An oak branch with acorns attached adorn as napkin holders.
Sage green water goblets are inverted and used as candle holders.
Melaluca tree bark makes a rustic placecard holder.
What more can you ask for?
Everything is practically free!
Basic cost for materials including floral foam, lights and planter starts at $30.
If you find most of your flowers and branches in your yard, you will save lots of money.

Close up of oak stem with acorn attached, with Melaluca tree flower, red liquid amber tree leaf and sage green ribbon.
Looks gorgeous against the eggplant and linen towels.
Cristina printed out names for the placeholders, antiqued them,and glued them to the Melaluca bark.
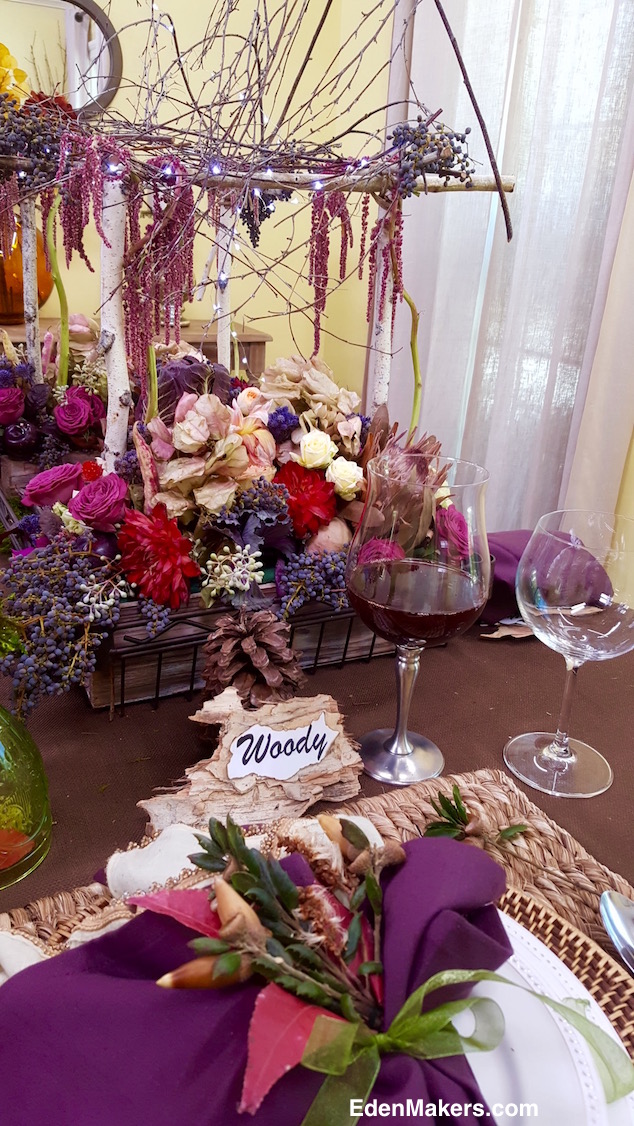
Side view of Thanksgiving tablescape with arbor centerpiece.

I'm very happy with the Thanksgiving centerpiece.
I hope you like it too and are inspired to create and design outside the box!


Your Commment
You must be logged in to post a comment.